Libreboot For Dell Latitude
Preamble
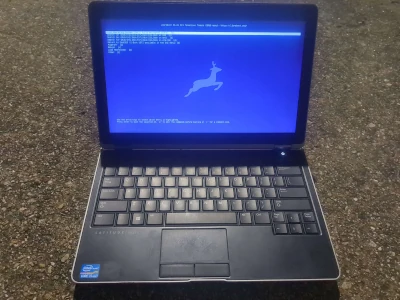
Libreboot is a coreboot distribution that provides (mostly) libre boot firmware. I installed it on a Dell Latitude E6230, which is a one of the supported laptops listed on Libreboot’s website. Unknowing to myself before undertaking this process, the Latitude line of laptops are actually easier to flash Libreboot onto, compared to other hardware. This process, Internal Flashing, can be done through Linux without any intrusive hardware work. There is an External Flashing way to do this as well, but that was too hard.
I assume that because every computer requires different workarounds & special care, the instructions to install Libreboot are not intuitive. The documentation is uniquely maze-like, making it painful to understand what is going on. This whole post is essentially verbatim from Libreboot.org, ∴ I actually don’t know what I’m doing. Follow the official documentation if you’re going to do this, using this page as a way to orient yourself.
In general, you download a utility called lbmk, do some minor hardware tweaks, patch the firmware ROM (which is Libreboot), and flash it onto your laptop. There is more steps than that, but there wasn’t anything on the website that spelled it out that plainly.
Background
This is the general outline that I followed.
- Download needed files
lbmk- libreboot tarball
- Install dependencies
- Prepare hardware
- disable /dev/mem protection
- Disable SecureBoot
dell-flash-unlock
- Build everything
- Inject vendor files
- Build ROM image
- flashprog
- Create backup
- Flash patched libreboot ROM
Hardware
- Dell Latitude E6230
- Intel i5-3340M (4 Threads) @ 3.400GHz
- Two 4GB RAM sticks; 8GB Total
Instructions
I did a clean install of Linux Mint 22.2 Xfce as a “clean slate”. SecureBoot also needs to be disabled if you are using a UEFI setup.
The two things that need to be explicitly downloaded is the lbmk (Libreboot MaKe) utility and the libreboot tarball. All dependency installation is done through lbmk.
Libreboot’s build system defaults to a single build thread, but this can be changed by changing XBMK_THREADS.
export XBMK_THREADS=4
Libreboot’s build system uses git, so you should install it.
sudo apt install git
Also make sure date/hwclock reports the correct time/date due to some files being downloaded through HTTPS that require correct date/times. I don’t see how this would be a problem if you’re connected to the internet and using Linux Mint.
Download
Download lbmk and install all relevant dependencies using lbmk. a list of support distros can be found in config/dependencies in the root directory of lbmk. The following example is installing the dependencies for Linux Mint.
git clone https://codeberg.org/libreboot/lbmk
cd lbmk
sudo ./mk dependencies mint
Next, download the libreboot files and check file integrity. This is part of the firmware that will actually be flashed onto the laptop. Make sure it is the tarball for your machine. I downloaded the tarball in the root directory of lbmk for simplicity.
curl -O https://rsync.libreboot.org/stable/25.06/roms/libreboot-25.06_e6230_12mb.tar.xz
curl -O https://rsync.libreboot.org/stable/25.06/roms/libreboot-25.06_e6230_12mb.tar.xz.sha512

# Check with sha512sum
sha512sum -c libreboot-25.06_e6230_12mb.tar.xz.sha512

# Check with gpg
curl -O https://rsync.libreboot.org/stable/25.06/roms/libreboot-25.06_e6230_12mb.tar.xz.sig
curl -O https://libreboot.org/lbkey.asc
gpg --import lbkey.asc
gpg --verify libreboot-25.06_e6230_12mb.tar.xz.sig libreboot-25.06_e6230_12mb.tar.xz
For the gpg --verify command, Look for “Good Signature”. Ignore “This key is not certified with a trusted signature!”
Disable /dev/mem Protection
If you don’t disable /dev/mem protection, I think you’ll get an error. Disabling /dev/mem protection requires editing a kernel parameter. This can be done through GRUB. Edit /etc/default/grub to include iomem=relaxed in the GRUB_CMDLINE_LINUX_DEFAULT line, as seen below. In Linux Mint, the default arguements should just be “quiet splash”, which should be after the addition of the iomem arguement. Once Libreboot has been flashed, this can be changed back to its original state.
GRUB_CMDLINE_LINUX_DEFAULT="iomem=relaxed quiet spash"
Exit the file, update GRUB, and reboot.
sudo update-grub
reboot
cat /proc/cmdline   # check if the change took effect.
dell-flash-unlock
For the Dell Latitude line of systems, Libreboot provides a utility called dell-flash-unlock that allows changes to be written to the EC. It is thankfully provided as a part of lbmk. Just go into the source directory for dell-flash-unlock and build it.
cd util/dell-flash-unlock
make
Run util/dell-flash-unlock. Once it has run, poweroff the laptop (I did this with the poweroff command). The laptop should start back up automatically, but in my case it did not. Just power the laptop on again how you normally would. Once booted back in, run the command again. There should be confirmation that internal flashing should now work.
Building
Because of Libreboot’s Binary Blob Reduction Policy, vendor files need to be injected into the tarball after downloading. This, of course, is another action handled by lbmk. If the program says that the tarball was modified after being run, then it should be good.
./mk inject libreboot-25.06_e6230_12mb.tar.xz
Next, the firmware ROM can now be built. All ROMs can be built with ./mk -b coreboot with no arguments, but you can target your specific laptop, as seen below.
./mk -b coreboot list       # Get a list of possible targets
./mk -b coreboot e6230_12mb
Flashing
flashprog is the utility that writes to the flashchip. It does not need to be downloaded separately. It can be downloaded and built through lbmk. It resides in the elf/ directory, for some reason.
./mk -b flashprog
Make a backup of the original firmware.
cd elf/flashprog
sudo ./flashprog -p internal -r ~/factory.rom   # I saved my backup to my home directory.
Flash. I flashed seagrub_e6230_12mb_libgfxinit_corebootfb_usqwerty.rom, but there are of course other options to choose from.
sudo ./flashprog -p internal -w bin/e6230_12mb/[ROM]
Then, shutdown the laptop. When I first tried to push the power button to start it back up, visually and sonically it looked like I just bricked my laptop. However, pushing the power button again started the laptop as usual.
Resources
- https://libreboot.org/docs/install/latitude.html
- https://libreboot.org/download.html
- https://libreboot.org/docs/build/
- https://askubuntu.com/questions/1120578/how-do-i-edit-grub-to-add-iomem-relaxed
- https://browse.libreboot.org/lbmk.git/plain/util/dell-flash-unlock/README.md
- https://www.youtube.com/watch?v=w5ZjmF4JdMo
- https://libreboot.org/docs/install/devmem.html
- https://libreboot.org/git.html